Editing in Moodle - Faculty
Every course begins as a basic shell, divided into labeled sections (in the default course format). You can change section titles and add items like descriptions, assignments, or readings specific to the section or class session.
There is also a General section at the top of each Moodle course which you can similarly populate with things like the syllabus, announcements, or a welcome message.
In order to make changes to your course page, however, you must first turn on editing capabilities.
For a more detailed video tutorial on editting in Moodle, please watch Moodle Overview for Faculty.
Jump to a section
Turning on Editing Mode
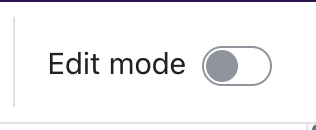
In the upper right corner beside your avatar, turn the Edit mode toggle on.
When you're finished making edits to your course page, you can turn edit mode off.
Editing Icons for Sections, Activities, and Resources
After you enable editing, there will be an Add an activity or resource button at the bottom of each section in your course. There are also plus + buttons to insert an activity at a specific spot between other activities.
Hovering over an existing activity gives you the familiar four-arrow icon for movement. Click-and-drag to move the activity.
Each activity and section has a vertical ellipses "⋮" menu of actions you can perform.

Edit settings lets you change an activity's name, description, due dates, grading, & many other options.
Move opens a dialog menu with an outline of your course, letting you choose where to place the activity.
Move Right lets you indent activities giving them the appearance of being nested underneath the ones that precede them. If an activity is already indenting, there will be a Move Left option to un-indent it one level.
Hide hides the activity from your students. You can hide items even if your course is visible to students, letting you progressively develop your course without your students seeing everything. Select Show to make a hidden activity visible again.
Duplicate copies an activity.
Assign roles is for overriding a user's role in the context of a specific activity. This is an advanced tool and will rarely be relevant.
Group mode lets you turn an activity into a group assignment.
Delete removes the activity from your course. It also deletes all associated information, such as forum posts or assignment submissions, so be careful when deleting. Deleted content stays available in the course "Recycle Bin" for one week.
Finally, there is a pencil icon next to each activity that lets you quickly edit its name from the course home page without entering its settings menu.
Section Actions
Sections, which group activities together and can represent a week of class or a topic, have a couple of additional actions available in their vertical ellipses menu.
Highlight highlights the section in the left-side course index. Note that, if you are using a weeks-based format, the section that covers the current week will be automatically highlighted.
Permalink takes you to a page where the section appears by itself. You can send the URL of this page to your students.
Hidden Elements
You can hide sections, activities, and resources by using the Hide option. Any hidden object is visible to instructors, but has a Hidden from students label. The label displays underneath the name of an activity or at the top of a Text and Media Area.

When you hide a section, all activities and resources within that section will also be hidden by default. You can also hide activities or resources individually.
"Add Sections" Link
At the very bottom of your course page, there will be plus + and minus - buttons for adding or removing sections.
If your course format is weekly, then each new section added will automatically be labeled with the next week's dates.
To remove a section, click it vertical ellipsis button and then Delete.
Note: If you remove a section that has activities inside it, those activities are deleted along with the section. Move any activities you want to keep into other sections!
Editing Blocks
Blocks are special tools or boxes of content that you add to the right sidebar of your course page. You may need to click the arrow icon in the upper right corner to open the sidebar.
When in editing mode, there is an Add a block button at the top of the right sidebar which presents you with a list of possible blocks you can add to your course. Some blocks can only be added once, such as Panopto, so if one is missing from this list then it may have already been added.
Gear Icon
Block's have a gear icon for their options analogous to the vertical ellipsis menu for activities.
Configure [block name] in the block menu will open its settings page.
Hide works the same as hiding activities; they will not be visible to students but still present in the class.
There are a variety of options related to roles and permissions for advanced usage that is rarely be relevant.
Delete deletes a block from the sidebar. Deleting a block generally does not delete any content associated with it. For instance, deleting Sharing Cart does not remove items from your cart and deleting Panopto does not delete videos.
Directional Arrow
Functioning the same way as for sections and activities, click and drag the directional arrow icon to move a block on your Moodle page. Note that blocks occupy their own column (the rightmost column on the course page), and while you can reorder blocks within that column, you cannot move blocks into another column.
Text Blocks
Most blocks have few configuration options relative to activities because they do one thing only. However, the Text... block provides a rich text description field where you can place any content you would normally put in a Moodle text area: formatted text, hyperlinks, images, or even Panopto videos. The Resources block that comes as part of CCA's Moodle starter course is a Text block with links to many of our most popular and useful services.